Thankful Friday

Woo it’s Friday!

As I said on Tuesday this week is all about thank you cards and today’s card is based off one i seen in the main catalogue on page 16 and I finally got my hands on the stamp set they used on it so I thought I would make my own version of it.

The colour in the original was Mint Macaron but I felt I should try using more pink and one of the few that I actually like is Calypso Coral. The pretty flow stamp In the background is from Awesomely Artistic and I actually stamped once on a scrap piece of paper before stamping on the card as I felt a direct stamp would be too vibrant for the look I was going for. The thank you sentiment is from One Big Meaning. The Thick bakers twine at the top of the card is new in this years annual catalogue and I absolutely love it and I comes in quite a few for my favorite colours, Cherry Cobbler, Bermuda Bay to name a few.

I was a little naughty with the button, it is Calypso Coral but it’s from a free set of buttons that was only available during this year’s Sale A Bration they had some fabulous stuff this year and I’m sure they will have some stuff just as good next year. This card layout is easily adaptable to any colour scheme or craft products you are using so go ahead and give it a try mix it up with your favourite colours and stamps to make it your own.

Thanks for stopping by, come back soon.

Birthday Card Tuesday

Its Tuesday!

Did everyone have a nice bank holiday weekend?

Mine was very quiet and ordinary and it was fantastic. Sometimes its nice to just sit and curl up on the sofa with you partner and do nothing but watch silly movies together or binge on that tv show you have been meaning to watch together. I also managed to do a lot more crafting this weekend and feel that I have plenty of projects ready to keep my blog going.

Now for this weeks card I tried a new technique, the shaker card! This my first time making one of these so I kept it really simple.

SAMSUNG CSC

What do you think?

As coastal cabana is one of the retiring in colours i really want to make use of it while I still can. The base is the usual half of an A4 sheet folded in half which i stamped with the stars from the perpetual birthday calendar stamp set and its stamped in coastal cabana ink ( I am really going to miss this colour but I think I may have a new favourite amongst the new in colours, watch this space to find out what it is soon).

The sentiment at the bottom is from the balloon bash stamp set from the Spring/Summer catty and I stamped it on using versamark and then applied white embossing powder to it.

To make the star shaker (not that there is much to shake I didn’t have any Sequin so I punched out some stars using the itty bitty accent punch) I used the second largest star framelet on a piece of daffodil delight card stock and on a piece of window sheet (when cutting the window sheet make sure to run it through several times before removing it otherwise it won’t cut through properly). Now for the border of the star I used the same star framelet and the one down from it arranging  them so one stat in the other on top of a piece of daffodil delight dsp.

Now the fiddly bit, I stuck the border piece to one side of the window sheet star and then placed small dimensionals on the opposite side but making sure they weren’t wider than that border piece. I then got my little stars and place them inside the frame made by the dimensions trying not to let them stick to them at the same time and stuck the other full star to the back of the dimensionals to close it off.

Thanks for stopping by, come back again soon.

Supply List

Built for Free Using:  My Stampin Blog

Birthday Card Tuesday

Today marks the last day of this years Sale a Bration and what a sale it has been.

They had so many good products up for grabs I kind of wish some of them will reappear in the new annual catalog till then however I won’t be using any of the products in blog post after today as I don’t think it is fair to you my readers or customers if they can’t get hold of the products anymore.

On a good note the new annual catalog will be released on 2nd of June this year so that something to look forward to and you can bet I will do a little sneak peek in the week leading up to it.

So as a nice send off to Sale a Bration I thought I would use some of the products for this weeks birthday card and here it its.

SAMSUNG CSC

The base is crushed curry I thought it made sense to use one of the colours highlighted at the start of sale a bration with the beautiful buttons and ribbons. Its half a sheet of A4 like most of my cards and it has been layered with a piece of whisper white thats has had a piece of sheer perfection vellum stuck to it. The vellum butterflies I coloured using crushed curry, calypso coral, coastal cabana, strawberry slush, pistachio pudding and baked brown sugar stampin write markers. I really love the effect this has created.

For the sentiment section I cut a piece of crushed curry to a little wider than 2″ so that the 2″ circle would fit on it with a little bit of yellow showing. I then punched one end of the curry card with the scalloped tag topper I then threaded some white twine through the hole and wrapped it around the inside of the card a few time. After that I stuck the circle over the top of the tag opening and then stuck the tag down on to the card in the desired place. To finish of the card I used the happy birthday sentiment from big day stamp set and mounted it using dimensionals.

Thanks for stopping by and I hope you had as much fun as I did during this years sale a bration.

Pootler’s Blog Hop

Pootlers Blog Hop-001

To day is a very special post as its part of a blog hop between members of the Pootler’s, and the theme of this blog hop is anything from the Spring/Summer catalogue or Sale-a-Bration brochure.

As I covered some of my favourite products from the spring/summer catalogue in my last products of the month post I decided to focus on sale-a-bration for this month.

So for my project I decided to create a special welcome pack decorated using only products available during Sale-a-Bration for anyone who hosts a party with me between now and the 31st of March.

Best Day Ever

Everything in this picture is available from stampin up (except the coins and the notebook).

SAMSUNG CSC

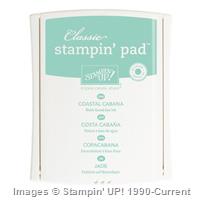
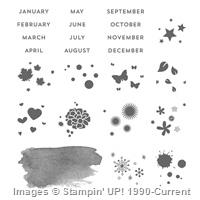
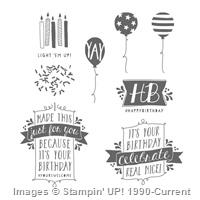
So to start I took a Petite Cafe Gift Bag (they come in packs of 10 and can be found on page 35 of the Spring/Summer catalogue) and stamped it with the little spotty stamp from the Best Day Ever stamp set using Chocolate Chip ink. The sentiment and flower are also from the Best Day Ever stamp set and stamped on Whisper White cardstock using Coastal Cabana ink.

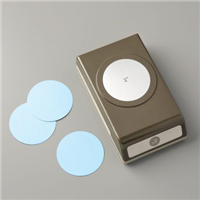
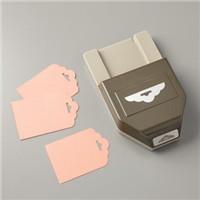
The flower was cut by hand and I used the Scalloped Tag Topper Punch on the sentiment and added a little of Calypso Coral ribbon to the top. The ribbon is part of the Best Year Ever Accessory pack and comes with Crushed Curry, Coastal Cabana ribbon and matching buttons.

Notebook

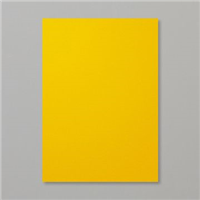
Stampin Up don’t do A7 notebooks so I bought them from amazon hereThe outside of the notebook was really boring so I spruced it up using Crushed Curry cardstock for the base measuring 3″ wide by 5 1/2″, scored at 4 1/8 and 4 1/4 for the depth of the notebook (for best results use Fast Fuse for sticking I ran out while making 10 of these and snail wasn’t strong enough to stick the card base to the notebook).

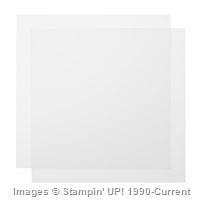
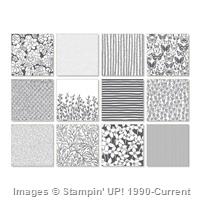
The front of the notebook uses a piece of Best Year Ever DSP (pack of 12 double sided sheets available as free gift during Sale-a-Bration) cut to 2 3/4″ by 3 7/8″. The sentiment is stamped using Coastal Caban ink and is from the Simply Wonderful stamp set another free Sale-a-Bration stamp set and is finished of with a rhinestone.

SAMSUNG CSC

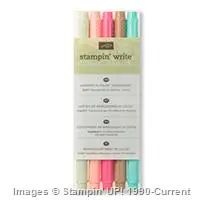
This lovely little bag of goodies is actually made from Real Red Goodie Gear Simply Created Kit which is currently on the clearance rack but you can buy these little cellophane bags at different sizes from Stampin Up. So to make it I just took one of the empty bags put in some coins and tied it with the Bermuda Bay Bakers Twine it comes with. The tag is already precut as part of the kit so I just stuck a scrap of Best year ever DSP on it. The sentiment is from the Simply Wonderful stamp set stamped in Coastal Cabana, the little banner is also pre cut shape from the kit.

We’ve got some Blog Candy up for grabs – to be in with a chance of winning a bundle of goodies, including the Best Day Ever stamp set, the Best Year ever paper set and the co-ordinating ribbons and buttons, all you have to do is work your way through the hop before midday on Sunday and leave a comment on every blog.  The winner will be chosen at random and announced in the Pootles Craft Forum and here on Tuesday, 3d March

Thanks for stopping by and please check out the next project in the blog hop by clicking the link below.

Pootlers Blog Hop backward_2-001Pootlers Blog Hop Forward-001

Mum’s Love

Today marks the start of a new series of posts where every week I will make a card based on this weeks Freshly Made Sketches Challenge.

So this weeks challenge is this sketch below.

FMS Final 175-001

As Mother’s day is coming in March I decided I would take this opportunity to use this sketch to make a Mother’s Day card using the fabulous Mum’s Love stamp set.

SAMSUNG CSC

SAMSUNG CSC

SAMSUNG CSC

To make each card I used the cute little note cards by Stampin Up and cut pieces of Whisper White card for the background pattern and a piece for the sentiment to go on. Normally I write down all the measurements but this time I did it by eye so I don’t know what they are (>.<). To make the background pattern I used one of the flowers that comes in the Mum’s Love stamp set and just stamped it at random. The sentiment I have used is also from this same stamp set. I then cut a piece of coloured card that matched the colour I had been stamping in and stuck it to the back of the sentiment. The next part was the hardest, tying the ribbon. I actually found tying it upside down was the easiest way to do it. This central piece was then mounted on the front of the card using dimensionals.

Hope you like the card and it was nice to make something that wasn’t a birthday card. Come back next week for the next challenge.

Birthday Card Tuesday

Last week of February?!

Feels like time is flying by but thats no surprise with all the crafting I have been doing lately. I sit down to make a few things at 10 and next thing I know its 3 in the afternoon.

So for this weeks card I have gone back to my favourite DSP Birthday Bash. I just love the mix of colours and happy patterns (if pattens can be happy?). Now there is one colour in this paper series that I hardly ever use and thats Night of Navy. Its not that I don’t like it, I just never found the opportunity to use it so I thought it was time it got its turn in the spot light.

Balloons

To make this card cut a piece of A4 Night of Navy cardstock in half horizontally then fold in half and brunish. Next cut down the Balloon Bash DSP to a 1/4 of an inch shorter of the base of the card on all sided. Next cut a strip on Night of Navy cardstock down to 3/4 of an inch high and the length of the card base. For the sentiment I have use happy birthday from the Big Day stamp set (get it free when you spend £45 between now and the 31 of Mach) and stamped it in Whisper White ink.

To finish off the card add a nice large shape to the right of the sentiment to make it your own, this could be a flower or a heart or a balloon etc. For the one above just punch out a piece of Calypso Coral card using a 2″ Circle Punch, stamp the cake from Big Day stamp set in Calypso Coral ink on Whisper White cardstock and punch out using a 1-3/4″ Circle Scallop punch and layer them using dimensionals.

Thanks for stopping by come back on the 28th of February for a very special post.

Happy Crafting!

Birthday Card Tuesday

Its Tuesday! That means its time for this weekes birthday card showcase.

This week I have done a collection of cards which are all based of another card that I made while testing out the Positively Chevron background stamp. I absolutely love the chevron stamp as it can work as a backdrop for any type of card or gift bag/box.

Here is the initial card I created.

Happy Birthday

To make the card I cut a piece of A4 Whisper White in half lengthways. I then cut a piece of Calypso Coral to 3 7/8 by 5 9/16 and stuck that the card base. Next I took the chevron stamp and inked it with Calypso Coral ink and stamped on a piece of whisper white. I then cut this piece down to 3″ 3/4 by 5 5/16 and then stuck that on top of the coloured card.

To finish it off I punched out a piece of calypso coral using a 2″ Circle punch and printed the HB sentiment from the Balloon Bash stamp set on a piece of whisper white using Basic Gray ink  and stuck them together then mounted it on the card using dimensionals. The Happy birthday sentiment at the bottom of the card is actually part of the HB sentiment and I kept it after I cut it away from the original stamped image. This was also mounted on to the card using dimensionals.

For the colour variation of this card I was just going to copy the layering and stamps used but I recently got the Tag Talk stamp set and matching Bracket Label Punch and wanted to try them out on a project and I thought this would be one to use it on as I didn’t fancy having to cut the HB for the sentiment over and over just to match the original card design. The colour that I have used are are all from the brights collection (except Calypso Coral and Basic Gray) they are Real Red, Tempting Turquoise, Melon Mambo, Daffodil Delight, Old Olive and Rich Razzleberry (not sure on that combo).

SAMSUNG CSC

Not the best photo I know but I am little pressed for a work space at the moment (hopefully that will change soon).

As you can see here I played around with the placement of the sentiment and colour combinations to create different effects. All of the extra strips of paper used on the design variations are actually off cuts from trimming the paper down to size. I try not to let any paper go to waist and some of the designs were a result of me try to get some use out of these little strips. The flowers were from the flower punch in the Itty Bitty Accents punch and I added a bright candy dot to each.

My favorite card is the Tempting Turquoise and Real Red one, Which ones yours? Do you have a favorite colour combination that I could try next? Let me know in the comments below.

Birthday Card Tuesday

Hi and welcome to this weeks Birthday Card Tuesday!

For this weeks card I decided to try and recreate a card that I had seen on page 12 of the new spring/summer catalogue.

.SAMSUNG CSC

To make the card I cut some A4 pool party cardstock in half and then folded that piece in half to form the base. Next I cut down a piece of the balloon birthday bash dsp and cut it so that it was 1/8 of an inch shorter than base on all sides I then mounted it on the base using dimensionals. The strips of paper used in the middle of the card were also cut from other sheets of the birthday bash paper and I cut into the ends to form the triangular banner shape, these pieces were stuck down with mini glue dots.

The sentiment and the balloon all came from one stamp set balloon bash. I stamped each piece on whisper white card stock (had to cut them all out by hand) and the ink colors used were bermuda bay and calypso coral as they are the same colours featured in the paper. The celebrate, happy birthday and balloon were all mounted onto the card using dimensionals and to finish the balloon off I added a piece of white bakers twine.

Hope you like the card, try making it your self its really easy!

Products of the Month

Well this month has really flown over, its been very busy month for me becoming a Stampin Up demonstrator, looking for somewhere new to live (still haven’t found anywhere) learning to drive, I even got to visit my lovely upline Han Wilks for a crafty afternoon in her lovely craft room (unlike mine where I swap between the kitchen table and my bedroom floor).

So for this months final post I just wanted to highlight some the products that I really enjoyed using this month. First up is the perpetual birthday calendar and the matching stamp set.

Perpetual Birthday Calendar Project Kit by Stampin' Up!Perpetual Birthday Calendar Photopolymer Stamp Set by Stampin' Up!

The perpetual birthday calendar is perfect for me because I have such a large family I tend to lose track of when everyones birthdays are so this calendar has helped me keep organised so I can start sending cards out in advanced instead of finding out on the day of their birthday and having a mad rush to make one (I really should batch make them so this doesn’t happen).

I bought the perpetual birthday calendar stamp set to coordinate with the calendar and to add that little extra touch of uniqueness to my project and that was all I originally bought it for but after messing around with its to decorate other cards and projects I was working on it quickly became my most used stamp set.

The next product I want to highlight is the color coach.

Color Coach

I absolutely love this product. I take it (almost) everywhere mine is really special to me as it was part of my welcome gift from my upline. I find it really helpful as Stampin Up offer a lot of colour choices with some really interesting names and I find it difficult to remember them all so when I’m trying to find the right colour but don’t remember the name I look it up on my colour coach. Another great thing about it is that each colour card also has a colour combination guide which I find really helpful when I want to try new combinations or have a colour but don’t know what to use it in conjunction with.

So my final product is the birthday bash dsp.

Birthday Bash Specialty Designer Series Paper   by Stampin' Up!

This product is one of my favourite dsps available in the current spring/summer catalogue. I absolutely love the patterns on this paper as I feel I can use it to make a card for any age or gender. Another thing I love about this paper is that is uses two of my current favorite colours Bermuda Bay and Calypso Coral which you will find I use a lot. This paper and my favorite colours are also a big feature in some of my up and coming birthday cards. They are going to be showcased as part of my Birthday card Tuesdays posts.

Thanks For Reading See you Tuesday 🙂