Good To The Last Bite

Today I started the day with a stack of pancakes, some turkey bacon topped off with maple syrup, it was delicious great way to started a Sunday(that’s the day I wrote this, by now its Tuesday) it’s a shame it wasn’t in bed, my partner hates breakfast in bed , he says I will get crumbs everywhere which is probably true haha.

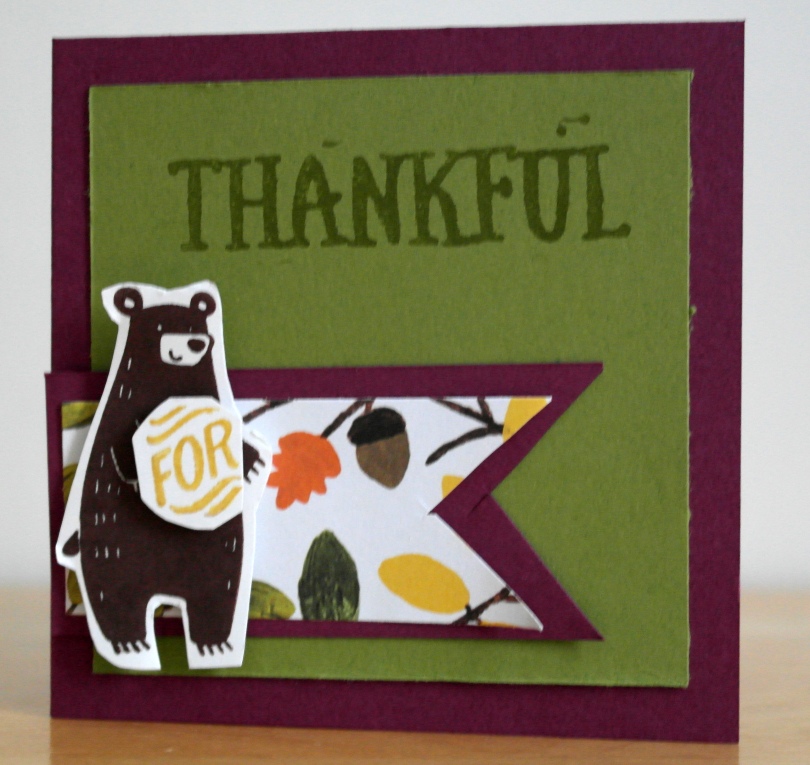
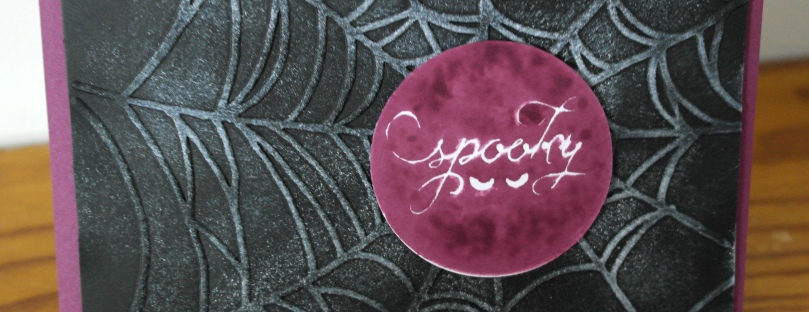
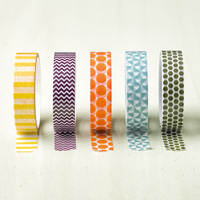
As we are approaching October I thought I would give some Halloween projects a go. Now I don’t usually do Halloween stuff so the paper I am using is a little dated. I got it off the Stampin UP clearance rack last year and haven’t used it and I’m not allowed any more Halloween paper till I use up the old one (self imposed rule to stop me from hoarding paper), which is a shame really because this year papers are absolutely adorable so you should check it out.

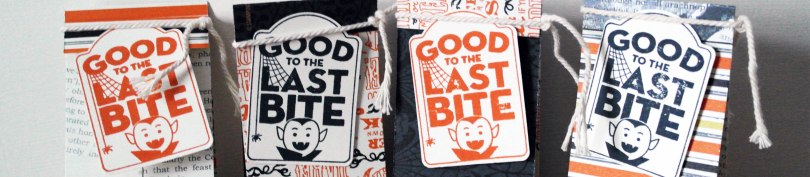
To start with I made these really cute little bags? Folds? Not really sure what you would call it but I seen them in new Autum winter catalog on page 46 and thought those are cute I want to make some, problem is it didn’t have any instructions on how big they where. I thought they were little bags but turns out it’s just folded strips of paper with a itty bitty bag of sweets in the center stapled together but they still look great.

They look good don’t they? I made a lot of them I hope it doesn’t rain this year as I really want to give them out to all the children who knock on the door and it would be a shame for them to get wet. For the tags I have used the stamp Good To The Last Bite which is from the amazing Merry Everything stamp set available in the annual catalogue .This stamp set is actually the first Stampin Up stamp set I bought so it’s very special to me. I haven’t been stamping that long, just a year and it’s flown by but I have been having lots of fun learning new things and I have met some wonderful people and hope to continue making and crafting for a long time.

Thanks for stopping by, come back again soon.

A Sunday Full Of Thanks

Today is the last day from my thank you card showcase. I will probably do more in the future but a bit more sporadically, any way for today’s card I use a cool blue colour combination.

This is one of those few cards I didn’t actually plan, I knew I wanted to use watercolour paper and the new thick cardstock in a project just no idea what it should look like, till I spotted an interesting card one page 125 in the main catalogue and thought maybe I could do a watercolour image similar to that one.

To start with I used a piece of watercolour paper and stamped some floral images on it in Versamark then applied some clear emboss powder and heated it up. Next I put a little bit of Bermuda Bay on a piece of window sheet and sprayed a bit of water on it and then squished this onto my watercolour paper. Next I took Lost Lagoon and a sponge and dabbed it and blended it with the Bermuda Bay. I set this aside to dry (for like a minute and then used my heat tool to dry it (>.<) while it was drying I cut my card base from a sheet of the new thick Whisper White card stock.

The sentiment is from One Big Meaning and is stamped in Bermuda Bay, I also used a scrap piece of bermuda bay I had and put it behind the watercolour piece, I like that its not a full border. I think it’s fun to offset layers sometimes to give the card a different look.

Well that’s all from me today, come back next week for some halloween themed fun.

Thankful Friday

Woo it’s Friday!

As I said on Tuesday this week is all about thank you cards and today’s card is based off one i seen in the main catalogue on page 16 and I finally got my hands on the stamp set they used on it so I thought I would make my own version of it.

The colour in the original was Mint Macaron but I felt I should try using more pink and one of the few that I actually like is Calypso Coral. The pretty flow stamp In the background is from Awesomely Artistic and I actually stamped once on a scrap piece of paper before stamping on the card as I felt a direct stamp would be too vibrant for the look I was going for. The thank you sentiment is from One Big Meaning. The Thick bakers twine at the top of the card is new in this years annual catalogue and I absolutely love it and I comes in quite a few for my favorite colours, Cherry Cobbler, Bermuda Bay to name a few.

I was a little naughty with the button, it is Calypso Coral but it’s from a free set of buttons that was only available during this year’s Sale A Bration they had some fabulous stuff this year and I’m sure they will have some stuff just as good next year. This card layout is easily adaptable to any colour scheme or craft products you are using so go ahead and give it a try mix it up with your favourite colours and stamps to make it your own.

Thanks for stopping by, come back soon.

Colour Me Thankful

I had a fab weekend of making a variety of thank you cards some of which I will be sharing with you this week. They are all really easy to make and very customisable so give them a go and put your own spin on them.

Here is the first card, something bright and fun to start the week.

Now I don’t have any big flat circle stamps with some sort of pattern on them so what I did for this image is use the reverse of one of the stamps from among the branches. They are all Clermont and have no rubber back which meant I could apply ink to it, so that’s what I did, although I actually used markers on mine to get that nice effect.

When I was planning this card out I knew I wanted to use the colours of the rainbow as they are so vibrant and cheerful and everyone feels happy when they see a rainbow or at least that was my thinking anyway. While I was making the card I sang the song in my head that we were taught in school for remembering the colour order “Richard Of York Gave Battle In Vain” Red, Orange, Yellow, Green, Blue, Indigo, Violet. Was anyone else taught that?

The big thank you stamp used on this card is from the set Another Thank You. I have had this set for a while and used it many times but I had never had any projects I could use that big thank you stamp on till now. It was stamped in versmark ink and then white emboss power applied. Simple but effective, only down side is this used a lot of embossing powder but it’s totally worth it.

Well that’s all for today, come back Friday for the next one.

Bear Necessities?

bog hop-001

Hello and welcome to a Pootle’s blog hop for the autumn/winter 2015 catalogue. There are some absolutely gorgeous stuff in this year’s fall catalogue, plenty to suit everybody’s tastes. I had to restrain myself from buying all of it! Plenty of bundles this time round too, like stamp sets with framelits and a really nice stamp set that comes bundled with a punch. There is also some really beautiful designer series paper too.

The things I am showcasing in my project are based around stuff that can be found on page 42 and 43 which are ‘Thankful Forest Friends’ and ‘Into The Woods Designer Series Paper’. There is also a coordinating cardstock pack for the ‘Into The Woods’ paper that is on the same page. The cardstock pack contains Old Olive, Rich Razzleberry and Soft Suede.

I love simple quick cards and that’s what I have for you today, three small simple cards that use a little bit of DSP, some stamping and a little bit of baker’s twine.

The cards I have made are from one sheet of A4 Rich Razzleberry and measure 3 1/2″ x 7″. This one has a square of Old Olive cut to 3″ x 3″. Now my favourite part of the card has to be the bear, I think it’s adorable and I really wanted it to look like it was holding that ‘for’. The Thankful For You is all from Thankful Forest Friends and I have just used the brights stampin write markers to colour each word then stamp.

This card I tried to layer different bits of DSP at jaunty angles to give it some interest, I’m not sure how well it worked but I do like the way the lettering turned out. For that I used my brights markers again colouring half the word in Daffodil Delight and Pumpkin Pie. Pumpkin Pie isn’t actually used in this DSP, I think it is actually Tangelo Twist but I still think it works because of the earthy autumn/fall tones.

I think this last card is my favourite as it is layered so nicely and that bit of Daffodil Delight looks lovely against the Rich Razzleberry, not to mention that adorable little fox just popping of the card! I think I could of just done a whole series like this one and just changed the colours but kept the layering style the same and it still would of been a nice series of cards.

What’s your favourite product from this year’s Autumn/Winter catalogue? Leave me a comment below and let me know.

Thanks for taking the tame to read my babbling, click on one of the links below to view the next/previous page in the hop.

bog hop_2_2-001                             bog hop_2-001

The Spooky Web

Happy Friday!

I’m super hyped for the weekend this week. I have just one job to take care of then I have the rest to sit and make a whole bunch of cards not to mention tomorrow is the Pootle’s blog hop and there will be lots of fun projects to have a go at.

Now today’s card is something I don’t usually do and that is Halloween Cards. Never really felt the need but I spotted this cool web embossing folder on the Stampin Up clearance rack and it looked cool so I bought it and then thought what am I going to use that on?

Well here it is!

I decided to go with Rich Razzleberry for the base, Halloween isn’t just orange, that and I only have a few sheets of Pumpkin Pie left and maybe a sheet of Tangelo Twist or was it Tangerine Tango? I always get those to mixed up and I had more purple to waste… I mean use.

As you can see I used a piece of Basic Black to emboss and then I dabbed on a little White Craft Ink. The spooky stamp is from a set called Among The Branches. Its a wonderful set and I have more cards planed using it. Unfortunately I had a bit of a problem with getting it to stamp out properly because my Rich Razzleberry was so juicy the ink kept running into the spooky lettering.

I have few other ideas that involve using this embossing folder but you will have to come back another time to find out what they are.

Thanks for stopping by and come back tomorrow for the Pootle’s blog hop.

Watercolour Wings Card Collection

Today was my eldest sisters birthday (there are five of us and I am number 4) or yesterday as I am writing this Monday but posting it Tuesday. Anyway as part of her birthday present I made her a card collection using watercolor wings which is a fantastic stamp set and she just happens to love watercolour effects so It went down a treat and as she has already seen and opened it can now share it with everyone.

There are five cards in total in this collection and I even made a little box for them to go in.

The box base was really easy to make but that lovely see through lid was a pain. The base is 6-¾” x 5-¼” and the lid is cut from a window sheet at 6-11/16” x 5-3/16 and that was the easy part. The difficulty is in trying to get the window sheet to bend and stick to itself. I had to score each edge multiple times and press really hard with the boon folder and even then it was a little reluctant. At the time I didn’t have anything stronger than fast fuse so I had to hold the tabs down for a while just to get them to stick.

Well enough about the box take a look at the lovely cards below.

Each one uses a different colour combination and the way this stamp set works is that each section of the butterfly is a different stamp and all of the stamps are clear so it make it easier to line them up when stamping. The way I stamped my butterfly was I picked two colours, stamped the lightest colour as the base but stamped off once before stamping the card. Then the outer wing edge stamp I used the same colour as the base only this time I didn’t stamp off. For the wing pattern and body stamp I use the darker colour and then a brown colour for the anteaters.

The top and bottom of each card was stamped using a dotty stamp from the stamp set.

If you’re unsure of how you want your butterflies to look I suggest experimenting on a scrap piece of paper till you happy with your technique.

Thanks for stopping by, come back again soon.

You’re On My Mind Again…..

Well it has been a hell of a week for me. 5 days of posts but I made it. I know I said a post every day of this week but I should clarify that I meant weekdays as I will be making lots of other fun stuff at the weekend.  Not to mention writing a post for the next Pootles blog hop.

This final card uses the sentiment You’re On My Mind. I think this is a rather useful stamp as it can be used in a variety of situations with or without the combings sentiment But Not In A Creepy Way to show your thinking of someone in a difficult time or used on a Valentine’s day card or anniversary card.

I think with a design of the card above you could even use it as a birthday card for a guy, just write or stamp the inside with happy birthday and your good to go. The Card base is Mossy Meadow and the blue is Lost Lagoon. I’m totally in love with the Lost Lagoon colour at the moment but I will try not to over saturate my blog post with it too much as Stampin up has such a fantastic colour range and I should try more of the other colours and try to use the pinks (scrunches up face). I’m not totally against pink I like the bright Melon Mambo and Watermelon Wonder it’s just I have no idea what to do with Blushing Bride or Pink Pirouette.

If anyone has any suggestions of pink card I could try let me know in the comments below.

Thanks for stopping by, don’t forget to come back next week for the blog hop.

Happy Bakers Box

And Suddenly it’s Thursday!

For today’s project I am combining the stamp set of the week That Thing You Did with a die set that I purchased recently and that’s the bakers box thinlet dies. I absolutely love this die set as soon as I seen it I new I had to have it. It make producing baker boxes so much easier no faffing about cutting and scoring and it comes with extra dies for embellishing like a cutie little heart or the word yum.

And here is the finished box.

Here I have used Crushed Curry card stock for the base of the box and before sticking it together I used the dashed line stamp from you guest it That Thing You Did stamp set but I wasn’t happy with that on its own so I used one die to cut a window in the box and then covered this with a little bit of window sheet then stuck the box tabs together. Pinched it at the top and tide the box closed with some Crushed Curry Striped Grosgrain Ribbon. For the front I used the happy birthday stamp and the swish from the stamp set of the week stamped in Lost Lagoon and mounted them on using dimentinals.

It’s a cute simple box but I feel it is a little lacking in some way so perhaps next time I will use some designer series paper to liven it up, till then thanks for stopping by.

High Five

So I had planned to have this and another two posts ready by Sunday evening and then just schedule everything but Sunday evening came and went and here I am typing the rest on a rather dreary Tuesday Morning.

Todays project is a card (I decided to alternate so tomorrow is 3d). Still sticking with that awesome stamp set That thing You Did.

For this card I tried out a technique I haven’t used before, no idea what it is called so if you know leave a comment below. Anyway, take the stamp of your choice, mine is High Five and pick 3 inks. Then ink the stamp in the lightest colour and then put a bit of the other 2 colours on either side of the stamp then stamp it down on your card stock. I wibbled a little when doing this so the H and the E became a little blotchy but I do like how the Lost Lagoon and Hello Honey blended together to make that nice blue/green colour on the left. To finish the center piece off I used another stamp from that set that looks like a dashed line and stamped it above in Tangelo Twist and below in Lost Lagoon. As the card base was also Lost Lagoon I stamped the bottom edge of the card using the same dashed line stamp. I also added a couple of stars which wasn’t part of the original design but i really liked the way it looked and I love stars.

I did a little something to the inside of this card.

A little bit of washy tap and a sentiment. The sentiment again is from That Thing You Did, I just love the versatility of this set and the variety of fonts it uses. As for the washi tape that’s from the 2014-2016 in colours washi tape set. I am really starting to like washi tape. I first I was a little unsure of how to use it but its so useful and fun and adds that little bit extra to a card if your not into ribbons and buttons this is definitely the way to go.

Well that’s it for today, come back tomorrow for my next project using this stamp set.